After playing Ayakashi: Romance Reborn on my phone for 6-ish months, I have a couple things that I wish I had known when I started playing that weren’t in any of the guides that I could find online. Because I really like the stories (and the art!) in this game and want to share my thoughts to hopefully make it more efficient for free-to-play players, I wanted make a helpful guide. I feel like part of why there’s not a lot of guides is maybe because the app is pretty good about teaching, so I’ll try to be brief about anything that I didn’t have problems with.
I’ve highlighted and summarized the parts that I think are helpful in boxes like this. Sorry for this heinous coloring…I can’t seem to find a way to put a border around the textbox without using CSS or plug-ins, which I don’t have access to.
How this game works is basically to earn points to rank up. Every time you rank up, you get one story key, which unlocks one chapter in the main story. You earn points by going on patrols and duels. In order to do that, you need character cards. As you rank up, you need more points to get to the next level. At my level (Rank 135), I’m earning about 2-3 story keys per week, and I log on maybe 2-3 times a week at this point unless there are events.

1. Milk Hall (Cafe)
The Milk Hall is where you invite your characters to hang out. It takes 5 hours to do one round, and after that round you earn a prize. As you invite LIs to the Milk Hall more, you rank up and the prizes get increasingly nicer. You get things from items you need to to level the cards up on the Spirit Board to diamond shards and points to Romance Sonnet keys.
This is also where all the cute chibi characters hang out, and you can click on them to see what they’re thinking even if they don’t have the exclamation point above them.


They have conversations!
2. Revival Event List
This is where there is a list of all prior events which you can play on your own time to get cards/stories from prior events. I haven’t done this yet so I don’t know much about it, but it seems like it’s only available for 96 hours (4 days) which is not very long, but there are items that you can use to help you earn points faster.
3. Character Info

You can either set a character so they always show up where Gaku is on the home screen, or you can have the characters rotate, which is what I do. This is where you can access character information including voice clips (yay!! 😍), CG album, card album, and there’s even a closet showing how much of their outfits you collected haha.
I look at the Profile section of LIs I like to see what month they were born so I can save up enough diamonds for their Birthday draws!
4. Story
This is the gold here 😊
The Main Story are where the routes are. There is a Prologue, then three chapters: Dawn, Twilight, and Night. Currently, all the chapters are out although some Night LIs might not be out yet. In each chapter, there is a Book I – Bonds, which kind of the second common route after the Prologue, and Book II – Lovers, which are the individual routes.


The rest of the tabs here are side stories. Romance Sonnets can be opened by keys from the Milk Hall, Cards & Patrols unlock when you level up the Story Board for I think SR and SSR cards to the “Story” section, and Event stories are prizes from hitting certain points in events. I have no idea where Others stories come from but I’m not complaining.
Whenever you finish a chapter, you get 3 diamonds, even if you just click into the story and click “Skip”.

Helpful: When you’re reading the stories themselves, there are two little arrows on the top right-hand corner (circled above) that you can click on to get the skip and log/history buttons.
5. Draw

This is where you get your character cards. Make sure you save your diamonds so you can have enough for Event/Birthday draws to get enough bells to redeem in the Shop!! I cannot stress this point enough and I wish I had done this more in the beginning instead of using them in the Diamond section. Maybe most people know this…and I just didn’t play enough mobile games, but planning in advance after I realized this has been going great for me!
Helpful: Doing event/birthday draws gives you free cards through redeeming bells in the Shop.
6. Cards

This is where you can make your cards stronger. There are 4 ways to do it: Level Up, Spirit Board, Awaken, and Evolve.
Level Up: increases the card’s level and uses points. You also level up by patrolling. I just use them on SR cards in the beginning and occasionally on SSR cards now, so I have a ton of these points, but they are also needed to Evolve.
Spirit Board: increases the card’s stats, and you unlock each tile using gems from patrols as well as items from the Milk Hall, all of which can also be found in the Shop. For SR and SSR cards, you can level up enough to unlock side stories! I have enjoyed these side stories and some of them are really very sweet.

Awaken: uses duplicate cards, as in, if you have two of the same card, you destroy one to awaken the other. You can awaken four times, and as when you awaken, the face of the card changes pictures (you can pick which one you like better). For any duplicates that I have after I awaken 4 times already, I discard them, which gives diamond shards.
Evolve: increases the card’s rarity, which increases its stats and max level, and uses items dropped from Evolve patrols. You can only evolve after Awakening a card 4 times. I have not Evolved yet but apparently if you evolve the card enough times, you can get an N card to become an SSR card.
7. Patrols


Main: uses LP for patrols and SP for duels. Other than the Sunday Daily patrol, the Main patrols provide the most points in order to rank up in getting Story Keys.
Helpful tips (applies to all Missions, not just Main):
– Completing all three Mission Info (circled in green below) gives you 6 diamonds. Completing all the pinwheel-looking things (circled in green below; in the picture there is only one, but sometimes there are three) gives 3 diamonds. I tried to complete all my missions to get all 9 diamonds as quickly as I can, for Main, Daily, and Event patrols. Evolve is slow-going.

– If you forget what the Mission Info is that you need to complete, click on the tool button circled in green below. It will tell you the Mission Info. Something that I wish they did was allow us to see how much small, medium, or large gems we have collected in the total gem-count that is circled in red below, but it seems like I can only keep track of that myself as I go through the patrols.

Helpful: You can see the Missions you need to complete while you’re patrolling by clicking the tool button.
– Each patrol gives you 18% on the Fever % if you do not select the LI face with the Partner box (see below), from 2% increase per selection. Selecting the Partner LI gives you 5% increase per selection, thus increasing your total Fever % by 3%. So for example, if you select Partner 3 times during the patrol, then your Fever % would increase 18%+3%x3=27% (another way of calculating: 2%x6 + 5%x3 = 27). This information is helpful if you want to know whether you should do a patrol right before it reaches Fever stage. Unfortunately, Partner LIs show up pretty randomly. I’ve had it sometimes only show up once, and sometimes show up like 6 times.
– Each Fever goes for 6 turns and doubles any gem you’d normally get. Your pinwheel % (above the Fever % bar) also increase 10% instead of the normal 5%.

Helpful: Plan out your patrol if you need to get as close to 100% as possible on the Fever % bar.
Evolve: uses the heart gem things (they’re called Vitality) for patrols and the green ghost (called Spirits) for duels. The Missions in Evolve patrol are SO hard to complete, so I try to get my Fever bar as close to 100% as possible so I can use all 6 turns of Fever in my Evolve patrols.
Daily: uses LP for patrols and SP for duels. If you have one takeaway from this game, it’s this: do the Sunday Daily patrols as much as you can, and especially with any Rice Omelets/Castellas that you have!!! These give you a TON of extra experience points in order to Rank Up, and is how I get at least one Story Key a week. This is important so I’m going to say it again:
!!!Do the Sunday Daily patrols!!!
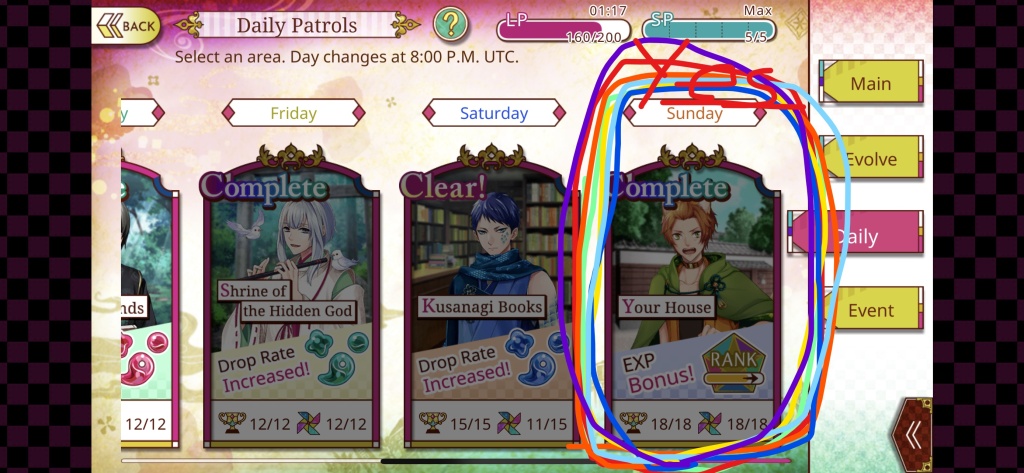
Helpful: Do the Sunday Daily Patrol to get extra points in ranking up!
Events: uses LP for patrols and SP for duels. I would encourage people to do this because you just get so much extra stuff that helps you rank up to get Story Keys, diamonds, cards, and event stories. It’s hard to get all the story chapters as a f2p player (I’ve only done it once), but it is possible if you really want to and have the time. I haven’t been as involved in Events anymore because they’re time-consuming, but I’ve been playing them just because.
A couple helpful tips for Events:
– Make sure you do the Duels, which provide a ton of event points (I haven’t actually calculated how much more Duels are worth, but I have done patrols before thinking I’d never get enough event points to get the prize I want, but I was able to get there with just one Duel lol).
– You get Duels by participating in the Patrols, so I just accept every Duel that comes my way until I run out of SP and Ice Cream.
– For patrols, make sure you use the Limited Time Rice Omelets/Castellas; for Duels, use the Limited Time Ice Cream/Milk.
Helpful: Do the events to get free items, cards, and side stories!
8. Missions

I really only log on now to make sure I can complete the Weekly missions since each Beginner Weekly mission gives one Story Key, and logging on 2 days/week is enough to complete that. I also just do the Daily missions whenever I log on since it’s not that much extra time.
Helpful: Do the beginner Weekly mission to earn a Story Key each week.
9. Item Box
This is where you get all your items that you’ve collected through reading stories, patrols, missions, log-in bonuses, etc. Make sure you collect these frequently because I think it can’t go over a certain threshold.
10. News
Any news on in-app events or updates (including software updates) are here.
11. Menu

This has a lot of information, of which I’m just going to go into a couple:
Shop:


Exclusive Items and Purchase Diamonds require spending money, so I’ve never used them. Use Diamonds and Use Shards allow you to get a variety of items. Because I only use my diamonds for card draws, I really only use the Use Shards to get cards (which change I think every week or every month) or Story Keys. Some people don’t think cards are worth it because they cost so much, but if I see something I like, I still get it anyway.
One of the most important places is the Item Exchange, which I didn’t know about when I started.

These are usually limited-time items that you can get with bells, medals, etc. that you earn. To be honest, I have no idea how to earn some of the medals to get the items with, but I do know how to get bells! You get bells from Birthday and Event card draws, a bell for every 10 draws for the same card draw (ex. you won’t get a bell by doing 5 draws at Kuya’s Birthday Draw and 5 at Ginnojo’s Birthday Draw), and you can use those bells to buy cards in Item Exchange. I’ve been using them to buy SSR cards, which cost 3 bells for the first and 5 for the second. These are basically free cards so make sure you claim them! The bells seem to carryover to the next month or event so you can save up for the ones you want.

Helpful: Redeem free cards with bells in the Item Exchange.
Badges: These are unlockable by completing the objective associated with each badge. They are displayable on your profile and gives rewards like diamonds, so make sure you claim them as you earn the badges.
Data Transfer: Set this up to make sure you can access your account in case anything happens. This is really the first thing I do when I start playing a new game.
Helpful: Set up data transfer to make sure your game is saved even if an accident happens.
12. Stats
Not much to say here. Hope this guide helps you enjoy the game more! 😊
